Don't Blow the Highlights!
Mar 03, 2021
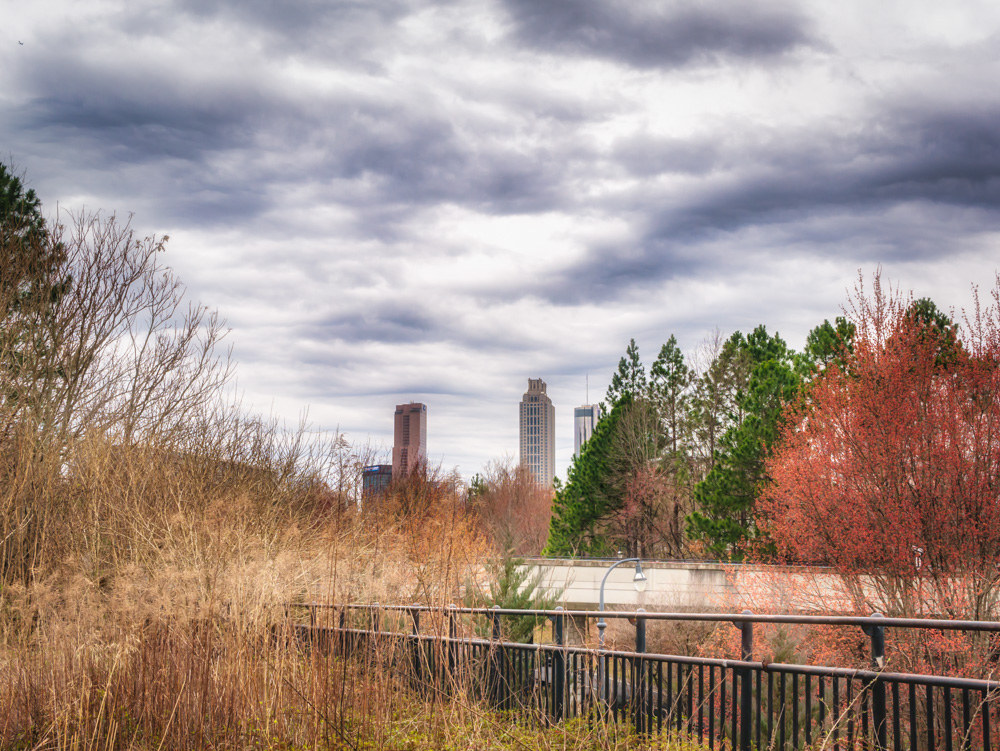 The City of Atlanta taken from the Old Fourth Ward
A Rainy Atlanta Day
Yesterday, it rained on and off here in Atlanta. It was cold and gray.
I managed to get my dog, Bauer, out for a walk between the raindrops sometime in the morning.
As we were walking back home, I noticed the sky was thick with cloud cover. I was thinking about how hard it can be sometimes to capture a gray, wintery sky without blowing out the highlights or making the rest of the scene too dark.
I thought I'd talk about that today.
Blown Highlights
What are blown highlights? It's when the photo or parts of the photo (usually the sky) are so bright that there's no detail whatsoever in that part of the photo. If you print a photo with blown highlights, there won't be any ink on the "blown" part of the photo. It will only be white paper.
Even if you darken the area with an editing program like Lightroom, you still can't get any detail in the blown areas. It also looks strange if you try.
I purposely overexposed a photo and took a screenshot in Lightroom so you can see what blown highlights look like:
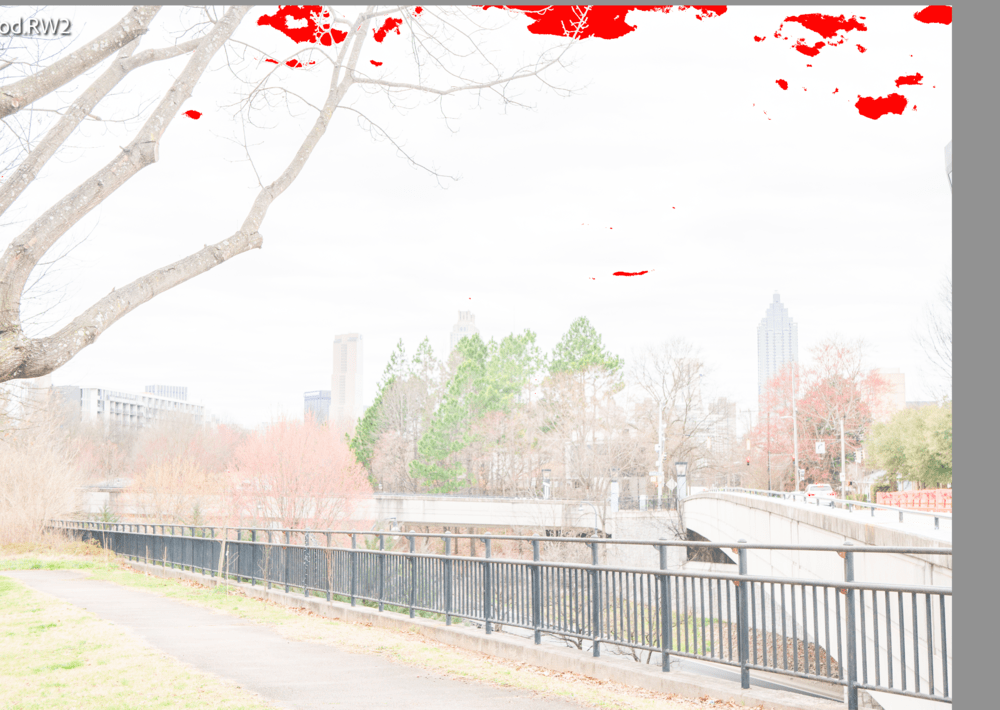
Overexposed photo with blown highlights
I was in a hurry and way overexposed the whole photo so I'd be sure and get the blown highlights.
See the red parts? That's Lightroom warning me that if I print that photo, the red parts won't have any ink on them.
Dealing with Blown Highlights
It's not always easy.
I'm amazed at how well modern phone cameras handle the situation. My iPhone has an HDR setting where it takes three quick photos at different settings and I end up with one well-exposed photo all while I'm hand-holding the camera.
What is the camera doing?
It's taking a dark photo, a mid-range photo, and a light photo and combining the three so all parts of the photo have the perfect exposure.
Underexpose the Sky
When I'm out shooting and I want the sky to have detail and not be super bright, I underexpose the photo. That works well most of the time. Sometimes, though, it means the rest of the photo is too dark.
I can always bring up my shadows, but that creates a lot of "noise" or grain in the dark areas. Sometimes that works, depending on the look I want, but other times it doesn't work at all.
The best way to deal with the situation is to put my camera on a tripod and take several exposures at different shutter speeds. I expose one photo that's perfect for the sky, one for the midrange tones, and one for the darks.
If you try this, make sure you don't move the camera or tripod at all between shots.
In Lightroom or Photoshop, I then combine the photos for one perfectly-exposed photo.
Sounds like a lot of work but it's not that bad.
It doesn't work well if there's a lot of movement in the photo - like traffic - because when you combine the photos, the cars are different in every shot, so the photos don't line up for the combined shot.
If you're doing a landscape shot and it's windy, you might have an issue with leaves, grass, or branches waving around. It causes blurry spots when you combine the photos. You can usually handle that situation in Photoshop with a mask but that's a conversation for another day!
In the cover shot for this post, I underexposed for the sky and then used the editing tools in Lightroom to bring up the shadows in some places and darken up the sky a bit.
It is tricky sometimes. Even after darkening the sky in Lightroom, you can still see some very bright areas, though there are no blown highlights.
I think the photo still needs a little work but this was a quick one to illustrate the point.
The takeaway? If you're out shooting and you want detail in your sky, try underexposing the photo a bit then pull up the shadows in your editing software.
Have a good one! And...see you between the raindrops!
xoxo,
Susan
You can find more photos on my site here.